nCode I.T. Limited! Yes, I’ve finally got round to setting up my own limited company. Since it makes more sense from a taxation point of view, and also gives me a platform to launch my own Micro-ISV. Since I’m deeply entrenched in the .Net world at the moment, I thought a bit of word play on the nXXX series of tools (nHibernate, nUnit etc) would have a cool geekiness to it. Anyway, the site basically gives a few details about my skill set & what I’ve been up to, purely for the contracting & outsourcing work, but the final (and as yet unlinked) section will pint to some of the work I’ve been doing outside contracting hours that’s helping me towards the fully fledged Micro-ISV status.
My first commercial product for my Micro-ISV will be a set of Bitmap Effects for .Net 3.5SP1.
This Effect pack will include :
- Desaturation Effect
One of the most missed features of WPF is that of greying out interface elements when disabled. when buttons containing bitmap artwork are disabled, the bitmap doesn’t go grey. There are lots of messy kludges and workarounds for this, but this effect addresses that problem completely. As opposed to some of the other available effect this doesn’t just change the element to grey scale it allows you to set a specific saturation level, allowing you to do cool effects like fade out your entire application to grey when it loses focus, kind of like the windows XP shutdown state. Unlike many other average-the-colours type of grey effects this uses the true NTSC colour weights to produce a correct desaturation.
- Colorize Effect
This will allow you to change the colour of any element and colorize it any new colour. Colorizing respects the pixels luminance, but changes the colour of each pixel to the new colour you’ve chosen. A simple effect. but very useful for fixing elements to all have the same set of tones.
- Skin Shade effect
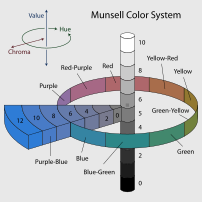
This is the special one. It allows you to completely re-skin your application (if it is set far enough up the visual tree, i.e. on the top level window) because although it changes the colours, it respects the relationship between them. In other words if you picture the shades used in your application on a colour wheel, they will remain the same relative distances after they’ve changed. This means that if you chose analogous, split compliments, or triadic hues, they will remain that way, but their base hues will be rotated. It sounds much more complex than it actually is! The end result is that as long as your colour set was pleasing to start with, it will remain that way, even after you apply the effect.
Here’s an example of the skin shade effect. Two different ‘skins’ provided by applying the effect right at the top level window. Allowing an almost infinite range of skins is now only 3 lines of XAML away! This is the WPF outlook Hands-On-Lab that the effect has been applied to.
Fancy a rose pink outlook ?

and a fraction of a decimal away are shades of purple.
![clip_image002[7] clip_image002[7]](http://rob.runtothehills.org/wp-content/uploads/2008/12/clip-image0027-thumb.jpg)
Notice that although the colours change, the intensity and saturation stay constant. If you have a nice pastel colour set, all you’ll get after applying the effect is more matching pastel colours.
Obviously these effects could be achieved by making sure you set all your element colours to dynamic resources, and then defining lots of resource dictionaries with colour schemes in, then adding an interface to load those schemes. Although this is the traditional way to manage themes (and obviously still has its place) making sure all your elements share the same styles or dynamic resources for colours its a royal pain, and error prone.
Using a single effect like this allows you to define one set of harmonious colours for your application, then get an almost infinite set of harmonious colours at the switch of a floating point value, without ever forgetting to set an elements colour, and also doing away with the resource hit of using dynamic resources for every screen element that you want to change colour.
Another feature of the Bitmap Effects is the ability to selectively apply the effect based on an Opacity value. This allows you to add the bitmap effect to your top level window but still maintain control of which elements actually get affected by the effect right down at the element level.
An example case where you would need this is an application that displays photographs. You really wouldn’t want your grandmothers purple rinse extending across the whole photo just because it was part of the visual tree that the Colorize effect had been applied to! Using a specific value for the Opacity we can exclude elements from the effect. There are samples provided which explain how to do this selective effect application.
All the effects in the library support selective application at the pixel level. Another useful thing this feature allows you to do is maintain a specific colour for your control’s text, and have it excluded from the application of the effects.
I’m currently working on the documentation and samples, but when these bits are done, you can purchase this effects library and get updates, support, and implementation help via the official nCodeFxLib Bitmap Effects site
Enjoy.
Rob


![Reblog this post [with Zemanta]](http://img.zemanta.com/reblog_e.png?x-id=6c3aab93-b37b-49f6-ad11-5773622c77e0)


![Reblog this post [with Zemanta]](http://img.zemanta.com/reblog_e.png?x-id=db6b54b9-f504-4644-bbec-58380434630a)

![Reblog this post [with Zemanta]](http://img.zemanta.com/reblog_e.png?x-id=132aa0f9-3020-4b44-901c-6351de170a5f)

![Reblog this post [with Zemanta]](http://img.zemanta.com/reblog_e.png?x-id=c9384e35-4901-4f2a-860a-28d149447f43)


![clip_image002[7] clip_image002[7]](http://rob.runtothehills.org/wp-content/uploads/2008/12/clip-image0027-thumb.jpg)
![Reblog this post [with Zemanta]](http://img.zemanta.com/reblog_e.png?x-id=6fd1fff3-3a68-48bb-b173-59a2e016f8b5)